 fannie@nbtorch.com
 +0086-0574-28909873



Every hunter knows the moment: the shot sounds right, the animal bolts into the timber, and by the time you walk over, the blood trail has already begun to fade into the dark. Whether the sun has just dropped or midnight has settled in, the difference between a recovered animal and a wasted one often comes down to one piece of kit: light. Not just any light — a blood tracking flashlight built around wavelength science instead of raw brightness.
Ordinary white light washes out the very sign you are searching for. It flattens contrast, buries dark droplets in shadow, and destroys your night vision with every careless glance. A purpose-built blood tracking light flips the problem: it makes blood appear darker than the ground around it, so a fading trail becomes a bright line of obvious clues. This guide covers the science behind tracking wavelengths, the specs that genuinely matter, the field techniques experienced hunters use at night, and a practical buying checklist — so your next dark trail ends in recovery, not regret.
Why a Tracking Light Is a Recovery Tool, Not a Luxury
Hunting carries a simple ethical contract: if you take the shot, you owe the animal a full effort to recover it. Wounded game that escapes is lost meat, wasted effort, and a wound left to the coyotes — and in most cases, the animal was lost not because the hunter lacked skill, but because the hunter lacked visibility at the critical hour.
Blood changes fast once it hits the air. Fresh blood is bright and obvious; within minutes it darkens, oxidizes, and soaks into soil or leaves until a white beam can no longer separate it from its surroundings. The first few hours after the shot are also when the trail is at its most recoverable — waiting until morning gives scavengers the night, allows the trail to dry and harden, and makes sign dramatically harder to read. For bowhunters, who routinely recover game well after dark, a good tracking light is not optional equipment; it is the tool that decides whether a long evening ends with a field-dressed deer or an empty pack.
There is also a safety dimension. Tracking at night means moving through unfamiliar timber, crossing ditches and blowdowns, often alone. A light that lets you see the ground accurately — while keeping one hand free and your dark-adapted eyes intact — is as much a fall-prevention tool as it is a blood-finding tool.Get low and sweep the beam parallel to the ground — the classic “sidelighting” technique that makes droplets glisten
The Science: Why Color Matters More Than Brightness
The red color of blood comes from hemoglobin, the iron-rich protein that carries oxygen. Hemoglobin is also a selective absorber of light: it strongly absorbs specific wavelengths — particularly blue-violet light in the roughly 450–480 nm range and green light in the 520–540 nm range — while reflecting others.
Here is where the magic happens. Shine a blue or green light on a drop of blood and the blood absorbs that light, appearing dark — almost black. The leaves, grass, and soil around it, by contrast, reflect the same light and glow noticeably brighter. The normal world is inverted: instead of hunting for a dark red stain on dark ground, you are scanning for a near-black spot on a bright background. That contrast flip is the entire basis of blood tracking lights, and it is why lumen output matters far less than wavelength choice.
- Blue-violet (450–480 nm): The classic blood-tracking spectrum. Hemoglobin absorbs blue light like a sponge, so blood goes nearly black while foliage and soil reflect the blue and light up. Blue is the first mode most trackers reach for on a fresh trail.
- Green (520–540 nm): The same absorption effect in a wavelength that many hunters find outstanding in grass and brush. Some manufacturers claim green shows up to 40% better contrast on hours-old trails than conventional white light — vendor claims vary, but the absorption physics is real and easy to test for yourself.
- Red (620–660 nm): Red is the navigator’s light. It preserves your natural night vision, keeps game calm, and does not announce your position across the ridge. Fresh blood also reflects red light strongly while most ground cover absorbs it — which is exactly why some tracking lights pair green illumination with a pulsing red beam to make fresh blood “flash” back at you.
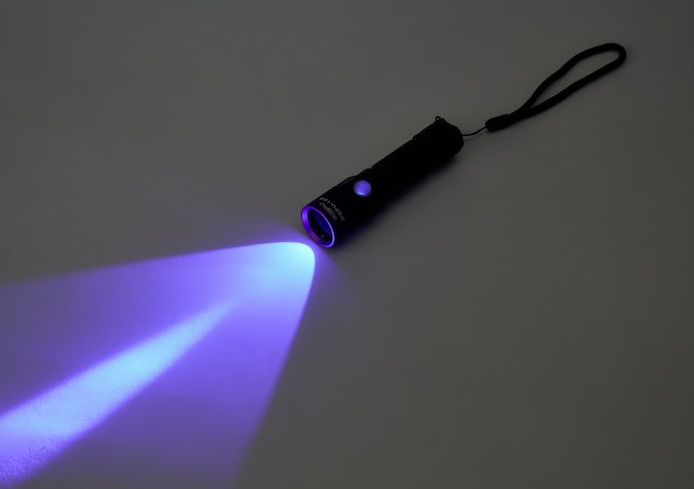
- UV (365–395 nm): The most misunderstood mode. Despite the common assumption, blood does not fluoresce under ultraviolet light — forensic research confirms blood is a non-fluorescent body fluid. UV only produces a weak absorption contrast on certain smooth, non-biological surfaces, and UV beams are typically narrow, so you will miss droplets outside the cone. Use UV as a secondary check on rock, concrete, or plastic — not as your primary tracking mode.
Red vs. White vs. Blue: Building Your Tracking Arsenal
No single color does everything, which is why nearly every serious tracking light offers multiple modes. A sensible night workflow looks like this: walk in on red to protect your night vision, switch to blue or green to actually spot blood, and drop to high-CRI white only when you need to confirm color and detail up close. Each mode has a job, and flipping between them deliberately beats staring through one beam all night.
White light is not useless — it is just the wrong tool for spotting. A high-CRI white mode renders true color, which helps you decide whether a dark smear is dried blood, mud, or bark. But used as the primary scanning beam, white flattens the very contrast that colored light creates. Keep white for the confirm step, not the search step.
Red deserves more respect than most hunters give it. Beyond night vision, red lets you approach a bedded animal without spooking it as fast, and it is far less likely to alarm a neighboring hunter’s stand. On the flip side, red is weak at revealing faint dried drops — which is where blue and green win. The ideal setup is not one color, but a light that puts all of them one button press apart.
The Specs That Actually Matter
When you compare blood tracking lights, marketing numbers like peak lumens are the least useful figure on the box. What actually determines success in the field:
- Beam profile: A wide, soft flood beats a narrow, concentrated spot. Hard beams throw harsh shadows across uneven ground and actively hide droplets; a broad, even beam reveals them. Look for a light that washes a clean pool of light rather than a hot center.
- Color rendering index (CRI): In your white mode, high CRI (90+) renders subtle color differences faithfully, letting you tell dried blood from mud or red bark at a glance.
- Lumens, used sensibly: You do not need 2,000 lumens on a blood trail. In tracking mode, roughly 100–500 lumens is plenty — and often less is better, because excess brightness burns out contrast. Save the high-output modes for walking the ridge or finding your way back.
- Regulated output and runtime: A regulated driver keeps output steady instead of dimming as the battery drains. A tracking session can stretch for hours, so plan for four or more hours of usable runtime, with spare batteries or USB-C rechargeability in your pack
- Durability and sealing: Night tracking happens in rain, mud, and cold. Look for an IPX6–IPX8 rating, an impact-rated body, and a lens that survives a drop onto gravel. Anodized aluminum bodies are the field standard.
- Weight and mounting: Hands-free is non-negotiable when you are flagging a trail or field-dressing in the dark. A headlamp on a low red setting plus a handheld light for sweeping is the classic combination; a tail stand lets you angle a handheld light along the ground while you work.
- Controls and mode memory: The best light in the world is useless if you have to cycle through strobe at 3 a.m. to reach the tracking mode. Insist on instant access to low or tracking mode, a mode memory that returns to your last setting, and a switch you can operate in gloves.
Field Technique: How to Track a Blood Trail at Night
A good light only performs as well as the technique behind it. Seasoned trackers follow a repeatable routine that turns a scattered trail into a connected path:
- Obey the 20-minute rule. After the shot, kill every light and sit still. Listen for movement, crashing, and final sounds. A wounded animal that is allowed to bed down is usually recoverable; an animal pushed by light and noise runs. Wait at least 20 minutes — and 30 or more for larger game such as hogs and elk — before walking in.
- Mark your last confirmed sign. Before you move forward, place flagging tape, a chem light, or a stick at the last spot where you know there was blood. Chem lights hung at chest height are cheap, visible from a distance, and let every member of the party see where the trail stood.
- Calibrate your eyes first. Find the first known drop, study it under each mode, and memorize how it looks. This calibration step is what lets you recognize faint sign later — blood under artificial light looks darker and sometimes almost black, so your eye needs a reference before you scan.
- Get low and use sidelighting. Hold the light down by your knees or ankles and sweep the beam almost parallel to the ground. This low-angle light makes droplets glisten and casts long shadows behind each drop, turning tiny specks into obvious markers. Shining straight down washes the signs out.
- Use a wide, soft beam and sweep in a grid. Move slowly, counting steps between drops. Scan in small overlapping strips, and remember that sign is not only on the ground: deer and hogs brush against trunks, low limbs, and tall grass, so check undersides of leaves and bark at shoulder height as you go.
- Connect the dots. Mark every few confirmed drops and work marker to marker instead of free-wandering. When you stop seeing blood, walk back to the last marker and widen the search.
- If the trail dies, go back and circle. Return to the last confirmed drop and search in an expanding spiral — commonly 20 to 50 yards — checking both sides of the obvious path. Wounded animals often double back or bed down in thick cover downhill of the trail.
- Approach carefully at the end. When you locate the animal, approach from behind and be ready for a second, finishing shot from a safe angle. Never rush the last few yards — a wounded animal is unpredictable in the dark.
Reading the Trail: What the Blood Tells You
Not all blood trails are created equal, and reading them correctly tells you how fast and how far to push. Bright red blood, often frothy and sprayed high on vegetation, signals an arterial or lung hit — the animal is losing volume fast and will usually be down within a short distance. Dark red blood in a steady drip suggests a muscle or venous hit; these animals can cover surprising distance but often bed down quickly if left undisturbed, so patience beats pressure. Brownish-green blood carrying stomach content and a strong odor points to a gut shot — the longest, trickiest trail of all, and one where waiting longer (with warm weather and meat spoilage in mind) is usually the right call.
Volume and spacing matter too. Heavy pooling means a high-volume hit and a short recovery, often within a hundred yards. Sparse droplets spaced twenty or more yards apart warn you to slow down, mark aggressively, and expect a long careful job. And remember: fresh sign is far easier to track than sign that has been rained on, dried, or covered by overnight dew — one more reason the first hours after the shot are gold.
Blood Tracking Light Buying Checklist
If you are shopping now, run any candidate through this short list:
- Blue-violet tracking mode (450–480 nm), plus a green option for grass and brush
- Red mode that preserves night vision for walking and close work
- Wide, soft flood beam with an even light pool
- High-CRI white mode (90+) for color confirmation
- Regulated output with four or more hours of runtime
- IPX6+ water resistance and an impact-rated bodyIPX6
- Glove-friendly controls with instant access to low mode and mode memory
- Headlamp and handheld pairing, with a tail-stand option on the handheld
Care and Maintenance
A tracking light lives a hard life, and a few minutes of care keeps it dependable for years. Store lithium-ion cells at roughly 40–60% charge for long off-season storage, avoid leaving lights in freezing vehicles or hot dashboards, and carry fresh spares in a sealed pouch. Clean the lens with a microfiber cloth — fingerprints and mud scatter light and kill contrast. Check the O-rings and threads each season to protect the water rating, and cycle every mode briefly before opening day so no switch has corroded into silence. A light you can trust at 2 a.m. in the rain is a light you maintain in July.
Frequently Asked Questions
Does UV light make blood glow?
No. Blood is a non-fluorescent body fluid, so it does not light up under UV the way a blacklight poster does. UV offers only weak absorption contrast on certain smooth surfaces and has a narrow beam. For finding blood, blue-violet and green are the effective choices.
What color light is best for tracking blood?
Blue-violet light in the 450–480 nm range is the classic blood-tracking spectrum because hemoglobin absorbs it strongly, making blood appear almost black against brighter foliage and soil. Green light in the 520–540 nm range performs similarly and can excel in grass.
How bright should a blood tracking light be?
For spotting, lower is better — roughly 100–500 lumens in tracking mode preserves contrast and saves battery. Very high output burns out the color contrast that makes blood visible. Reserve high modes for general navigation.
Can I just use a regular white headlamp?
You can, but white light flattens the contrast that colored tracking light creates, and it ruins your night vision. A red mode for walking plus a blue or green tracking mode will find blood that a white beam simply washes out.
Is red light ever the best choice for tracking?
Red preserves night vision and fresh blood reflects red strongly while ground cover absorbs it — the basis of “flashing” tracking modes. But for faint dried drops, blue and green produce far stronger contrast. Use red to get there safely, then switch to the tracking color.
Conclusion: Let the Right Wavelength Finish the Job
A blood tracking flashlight is not a gadget for the gear-obsessed; it is the tool that closes the loop on a clean, ethical hunt. The right wavelength flips the contrast so blood jumps out of the background. The right beam reveals instead of hides. And the right technique — patience first, sidelighting, aggressive marking, and calm circles when the trail fades — turns a losing fight against the dark into a recovered animal.血迹追踪
Whether you are a bowhunter following a midnight trail or a rifle hunter tidying up at dusk, match the light to the task. Study your modes before the season, practice your routine, and carry a light you trust. Your game — and your conscience — will thank you for it.
Post time: Oct-22-2026


